Share
Pin
Tweet
Send
Share
Send
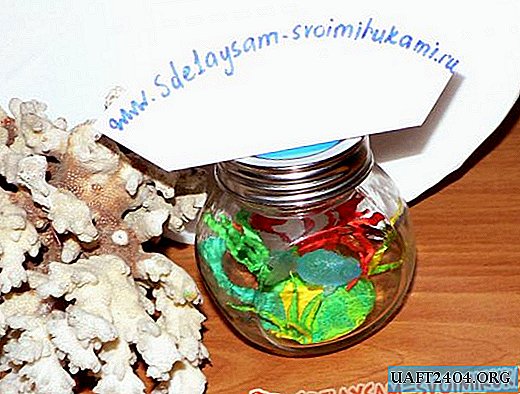
In a game with a baby, it is often possible to create something new and unusual with your own hands. This may be a castle from the designer, not provided for by the assembly instructions, a doll from an ordinary knitted sock, or ... an aquarium with a fish floating in it!
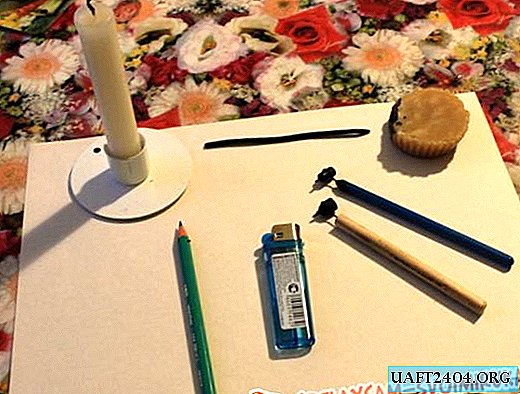
To create a toy mini aquarium you need quite a bit:
- a small jar (it can be a decorative jar or a beautifully shaped 500 ml jar of marinades);
- a cover to the bank (better twisting);
- self-hardening mass for modeling (excellent material for creativity provides the brand "Kalyaka-Malyaka);
- a plastic fish (for sure, in your kid’s toy arsenal there are a couple of small fish);
- thin fishing line or monofilament, thick needle;
- thin wire for creating frames of underwater plants.


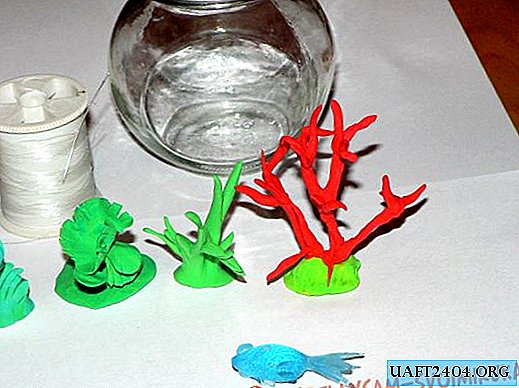
Getting to work. In order to equip our aquarium jar, you need to make several aquarium accessories (in principle, you can use the finished plastic flora by buying it in a store, but we will do it ourselves). We take the wire and make the frame to create coral - we make it small, since the mass for modeling will allow you to build an impressive structure on top of the frame (it is very light and quickly hardens).

From the mixed yellow and green masses we make a base stand under the coral, with a sharp object we slightly loosen the surface for naturalness.

We insert the coral frame into the stand and begin to slowly fit it with a red mass.


Now that the frame is covered with mass, it’s easier for us to attach small parts that go beyond the framework, since the molding mass has high adhesion, and due to its lightness it does not pull down, as it would with ordinary plasticine.


Small green plants can be sculpted even without a framework, which we did by trying to make them resemble marine plants in shape.

While the plants are slightly dry, we make a mount for hanging fish in our aquarium. To do this, we sculpt a little blue mass on the lid, form a ball and make a hole in it, fasten the ball in the center of the lid. A fishing line will be threaded into the hole of the ball, on the other end of which a fish will be suspended.


A set of accessories for the "sea day" is ready, the mount for the fish, too, it remains to make a stand for the plants - that is, the bottom itself.
We take the green and yellow mass and form the bottom, applying a little imagination - here we have yellow sand and greens, a little algae along the edges.


We do not allow the bottom to dry and carefully immerse it in a jar, press it with a pencil to the glass bottom, straighten the algae and lower the same and attach our slightly dried plants (they are still raw from the bottom) to the still-not frozen bottom.

We take the fish and, having made a hole with an awl or scissors on the back, insert a fishing line into it, tie two knots and cut off the small end of the fishing line, second, long, thread a couple of times into the hole in the ball on the lid, do not cut the fishing line so that its length can be varied.


As for water - you can pour it, but you can not pour it, due to the fact that the space inside the jar is small due to plants, due to the effect of thick glass, it seems that there is already water in the aquarium. If water is poured, then very quickly all the algae, fishing line and fish will be covered with small bubbles, which does not look very good. We fasten the lid - the fish looks great in our aquarium!


Share
Pin
Tweet
Send
Share
Send