Paper wallpapers and plaster in the 21st century are not relevant, they were replaced by better and more convenient materials. We are talking about liquid wallpaper - a finish that combines ease of application, attractive appearance and affordable cost.
Liquid wallpaper allows you to hide wall defects, do not cause allergies, do not ignite. For work you need: a mixture for the preparation of liquid wallpaper, decorative elements, a basin, a spatula. Everything is ready - you can proceed.

Step 1. Preparing the walls
It is necessary to remove the remains of plaster, old wall-paper, to clear a surface of dirt. Special meticulousness is not required. The material fits snugly against the wall, hiding bumps, cracks and other defects. At any time, a section of wallpaper can be removed using a clerical knife.
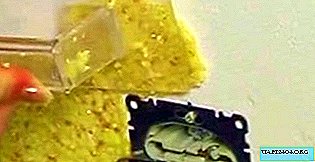
Step 2. Preparation of the composition
Pour the dry mixture into a plastic container. If desired, you can add decorative materials (dyes, confetti, colored paper fibers, etc.). Pour water, mix the mixture by hand until the consistency of sour cream. The recommended ratio of water to dry mix is indicated on the packaging. If the composition is too liquid, add the mixture. If too thick - dilute with water.
Step 3. Wall Application
Using a spatula, apply liquid wallpaper to the wall. Note that this finishing material serves in
as additional thermal insulation and sound insulation. The coating thickness can be from 1 to 4 mm. The thicker the layer, the better the effect, but the consumption of the mixture will increase.
The work is done
As you can see, even a child can cope with work. Fresh finish will dry during the day, this process can be accelerated with a heater. The service life of liquid wallpaper will be at least 10 years.
Add entry
Picture Video Audio Text Insert code