Share
Pin
Tweet
Send
Share
Send
I decided to make myself a light cube from an ordinary mesh basket for toys, once bought on Aliexpress at a ridiculous price. Over time, the need for such a “tank” disappeared, and for what else to adapt it, I just did not think until the idea was born to make a photo box with my own hands. For a folding version, such a basket is an ideal base. The work, however, is more painstaking, but the product is neat, lightweight, compact. And he practically doesn’t take up space - at least for the back of the sunset sofa, at least push the cabinet “roof”!

Cost of manufacture and components
The total cost of a homemade light tube did not exceed $ 7: the basket cost $ 1.5, 2 mini-lamps on clothespins - $ 3.0, and a pair of 15-W LED bulbs with an initial power of 100 W - $ 2.5 . Well, the old calico sheet, which is not a pity to cut, is likely to be found in any dresser. Of the tools, only threads with a needle, a sewing spreader, a soft measuring tape ("centimeter"), large pins and sharp tailoring scissors are useful. Now spit in the palm of your hand and let's get to work!

Production of photobox
We carefully disassemble our design - just unzip the seams connecting all 4 faces of the basket. Then we remove the grids and get light metal frames. As you noticed, these frameworks unexpectedly take a circular shape after being released from the fabric. Surprise, of course, but quite acceptable - we will work not with ovals, but with rings.

With a flexible "centimeter" we embrace one ring and determine the length of the future inlay. In my case, 146 cm came out around the perimeter, to which I added 4 cm to the edge hem. In total, you should get 4 strips of one and a half meters long, and we make the width a little more than the standard - about 3-3.5 cm

Now we need to cut out these rings “core” - 4 fabric circles, which will act as diffusers. We just measure the diameter of the rings and look for some basin or other thing with suitable sizes at home. My thing turned out to be a cover from a boil-out with a diameter of 47 cm. I carefully outlined it, and when cutting it, I added 3 cm (that is, I increased the diameter to 50 cm so that it would be enough for sewing the inlay). Important: do not try to draw a circle on the fabric using a compass - in vain ruin the material.

When all the details are ready, we begin to alternately process each of the rings with an inline. You grab the edges bent on both sides with pins - there is no point in threading with threads, because we will need to insert the core in the tie.

This is what we will do now: we take out 2-3 pins, insert the edge of the core with a margin of a couple of centimeters and sweep through it with white thread. So continue in a circle until we process all 4 ring frames.

Ready circles turned out very neat, right? Here, for example, how it turned out for me: I fastened all 4 circles with ordinary stationery clips (binders). For clarity, I turned the structure upside down.
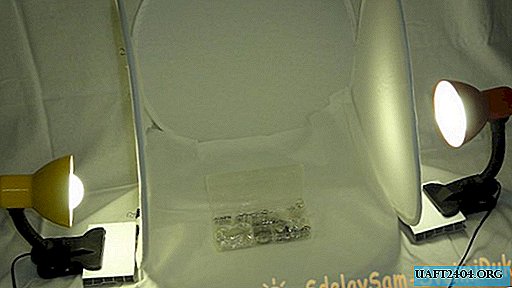
Now we return the box to its “natural position" and prepare it for shooting. Opposite the side walls, install the lamp. If you are going to take pictures on the table, the lamps can be fixed with clothespins along the edge of the countertop, but since my table is too narrow, I have to do it on the floor. And so that the lamps do not stagger due to clothespins, I attached scraps from a plastic window sill to them - it keeps perfectly, by the way!

The first shot came out so-so, because it is "white on white."

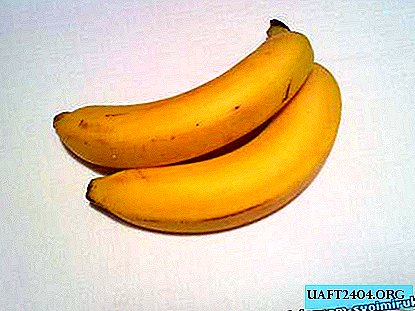
But here it’s better: everything is clearly visible, up to the inscriptions on the bottles.

The elephant in double packaging (cellophane + organza bag) also turned out to be quite “readable”.
Note: I laid down the bottom of my light box with a piece of the same sheet, but in order not to bother every time before shooting, smoothing this section, you can replace it with a 50-centimeter strip of whatman paper, and hang the “holes” in the corners of the structure with pieces of fabric from the outside.
And one more moment. For my purposes - to photograph objects of needlework and dishes for photorecepts, this light is enough. But if you plan to shoot something small (detailed), then the 15 W LED bulbs will not be enough, you will have to buy a couple of more powerful lamps. Have a good shoot!
Share
Pin
Tweet
Send
Share
Send