Share
Pin
Tweet
Send
Share
Send
Today, on Chinese sites, you can find ready-made kits for troubleshooting glass defects. Their quality does not always correspond to the declared, although they cost an order of magnitude cheaper and are sold in whole sets with tools. Better and longer lasting effects come from branded auto glass crack polymers like Pit Filler, Long Crack or Delta Kits. The problem in most cases is solvable, but such restoration must be applied competently. Let's see what professionals advise on this subject.
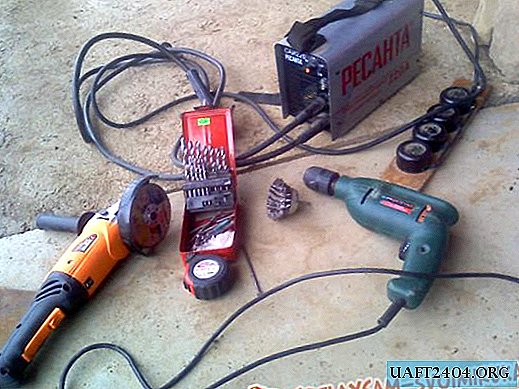
Necessary facilities and tools
Materials:
- Specialized polymer of various viscosities;
- Set of translucent celluloid plates.
Tools for auto glass restoration:
- Drill with diamond conical drills;
- Scriber for marking holes;
- Scraper blade;
- Crack expander (suction cups on a rail);
- Ultraviolet lamp.

Preparatory work before restoration
Before you start sealing defects on the glass, you need to diagnose them. The best solution is to contact a professional craftsman for advice on whether to start this business at all or whether it is better to purchase a new windshield and not spend money on expensive polymers and tools.
All factory branded windshields are made of triplex, and are labeled L or WL. Their main damages are as follows:
- Chips
- Potholes;
- One-sided cracks - only outside the glass;
- Bilateral cracks - on both sides of the glass;
- Lucid fissures are a "star" or "cobweb." A crack emerges from one point in different directions or around a circle;
- Combined defects - a combination of several types of cracks, potholes, chips, etc.
Only a professional craftsman, having analyzed the defect, can confidently say how much the crack will be fixed, what will remain visible and how much material will be needed to work.
Do it yourself crack on the windshield
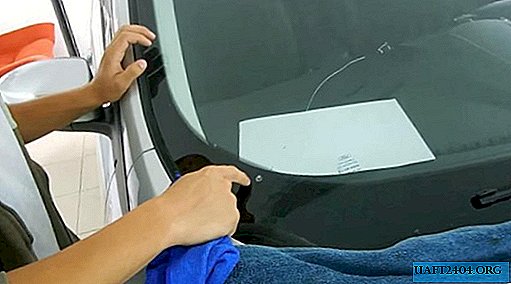
The defect, on the example of which we will today consider the restoration of glass, is combined and quite common. In the lower right corner there is a point of impact, and as a result, a pothole like a horseshoe or a bull’s eye. A one-sided crack leaves from it. Before the main work, a set of measures was taken to stop it at the extreme point. Drilling a hole was carried out with a drill, and filling it with a special injector under pressure.
The sequence of polymer spillage is as follows - first the crack itself is filled, then the stopping place and then the impact site. Before work, it is necessary to carefully wipe the pouring area with a clean rag dry. Use a detergent if necessary.


Carefully fill the crack from the bottle with the polymer, moving from the silkscreen to the place of stopping and fixing the crack.


If the crack is well opened, and does not require the use of a dilator, it can be filled with polymer. In some places, the polymer can remain on the surface without going into a crack. The problem can be solved by punching from the back of the glass. To do this, it is necessary to squeeze the glass from the side of the passenger compartment, slightly pressing the finger to the stagnation site. The effect of leakage of the polymer should appear immediately.


So that a fragment of a crack filled with a polymer does not gain air while punching the glass, it is necessary to seal it immediately. To do this, lubricate the celluloid strip with a polymer, and cover the treated surface with it. This material should be cut into small strips 5-7 cm long so that they are convenient to use.


The polymer should be poured sequentially with a solid line so that in no case will blind spots be left that can subsequently fill with air. Possible microbubble formation is clearly visible in the light. Such zones are worth going through the polymer again, if necessary, forcing the back side of the glass.


Also, during the use of the polymer, it must not be allowed to dry on an incompletely filled surface. This can lead to irreparable consequences, and reduce all work to nothing.
Around the final zones, which are fixed in advance, it is most difficult to drive the air out of the crack. It is necessary to push through the glass extremely carefully. There is a big risk that the crack will simply go further, adding a good amount of work.


If everything went well, the crack should be as transparent and invisible from different angles of view. After that, we expose the UV lamp, and dry the polymer with the plates.


Remove the dried plates one by one, prying them with a scraper. To avoid visible imperfections of the seal, it is necessary to clean the polymer residues with a scraper strictly along the direction of the crack.


The quality of cracks in auto glass depends on many factors. However, on the recommendation of the masters, in most cases, excessive defects can be minimized, saving on the cost of new glass and its installation on your car in the service.


Share
Pin
Tweet
Send
Share
Send