Share
Pin
Tweet
Send
Share
Send
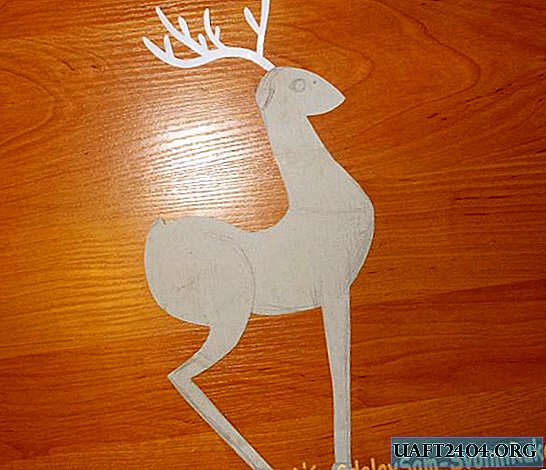
Starting work, I make a sample on paper. At first I wanted to make the toy long legs and a small head, but in the course of work on sewing, I corrected the flaws of the sample by increasing the size of the head. Initially, the paper sample looked like this:
After that, I took the fabric from the old coat and cut out two parts of the body with the head out of it, and then made the detail of the tail and the middle part. The part of the middle part will have to go from the neck of the toy to its hind legs (almost through the entire body).
Cutting out every detail, I leave at each of them along the edges sections of allowance from 0.5 centimeters. In the photo below, between the details of the body there is a detail of the tail and the very middle part:

I sew together the details of the body along the edges in front, but I don’t sew the back so that it would be more convenient to turn the crafts out from the inside a bit later. In front, I sew the middle part of the body, and for the details of the legs, I cut out the second pair of samples:

Next, the cut out samples of the legs I sew to the craft. After that, it will look like this:

To make the hooves of the craft, I decided to make four round parts and sew them. To compile the details, the horn did not have enough fur fabric, and therefore I had to use a simple fabric:

In order to make it more convenient to sew the horns, I left the section of the nape of the toy unstitched.
I sew round details to the "hooves" of my craft:

Next, I take the foam rubber and cut 4 parts from it in pairs in order to fill the horns of the future toy with it.
Foam rubber can be used as a filler in the event that a conventional filler is not convenient to enter into too narrow tissue areas:

Having cut four parts from the foam rubber, I put fabric samples on both sides on top of them and sew them on. In the event that the foam is not sufficiently dense, the horns of the craft can be filled with cotton wool using tweezers:

Now the resulting horns must be sewn. I turn my craft out of the wrong side and sew the horns to the back of her head, folding down the areas of the allowance, and then sew the neck.
But the legs of the craft turned out to be impossible to completely turn out of the wrong side because there is fur inside them, and from bottom to bottom they become wider, and therefore I decided to leave them short:

After that, I fill the toy with cotton and sew it. During stitching, I prepare the tail part and the area to which this part will need to be sewn:

The tail detail should be folded four times:

After that, you need to sew the tail part to the craft:

Now, I cut four parts from the thin brown fabric in order to make the ears:

I wrap each pair of parts around the edges:

Next I take the foil. For crafts, you can take not soiled foil from under the sweets:

From foil we need to cut out figures of snow (circles) and stars, after which we take rhinestones and a plastic bottle.
From the bottle we need to cut three thin transparent strips, to which we will glue the blue rhinestones a little later:

Transparent strips with rhinestones will adorn the neck of the toy. For them, you should calculate the length, mark the beginning and end for the areas where the rhinestones should be, and then put the rhinestones on strips:

Next, to the head of the craft, you need to glue red rhinestones as eyes and sew on the ears, and fasten the resulting strips at the ends using a stapler:

If we attach three transparent strips with rhinestones to our almost finished toy, then it will look like this:


Now it remains to do the last two actions: stick the figures of snow cut out of foil with asterisks and make a nose. First, I decided to stick the foil shapes to the horns, back and hoofs of the craft:

Next, from a light brown fabric, I cut out my nose:

Having made the detail of the nose fit to the head in size, I stick it:

This is how the bonded plastic strips decorated with rhinestones look at the back:

After that, my toy "Deer" is ready:

Share
Pin
Tweet
Send
Share
Send