Share
Pin
Tweet
Send
Share
Send
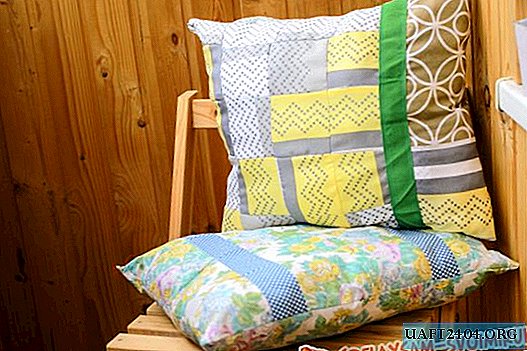
Necessary materials:
- fabric (in this case, one flap was used with a large number of patterns on the canvas),
- scissors
- sewing machine,
- filler
- sewing threads to match the product,
- decorative tape.

Process work.
1. It was decided to sew a pillow not just from square rags, but with an unusual pattern and non-classical approach. To do this, cut out two rectangles for the future pillow. One rectangle should be longer than the second. The third rectangle is cut after stitching the other two. It is an additional connecting part of the product. The photo shows the smallest detail.

2. Cut the squares from the smaller rectangle, the larger of the two will function as the back of the pillow.

3. Sew the squares with a clipper.

4. Sew the two parts of the pillowcase, thus connecting only the top of the future product. The side and bottom are left untouched.

5. The photo shows the front side of the product.

6. Try on the decorative tape at the junction.

7. Sew the tape.

8. The photo shows the back of the product. The third and complementary rectangular piece of fabric is located below, it is forming when assembling the pillowcase. Now the back and front of the pillow are the same size.
9. Stitch fragments from the bottom and sides, leaving a hole for the filler.
The seams on such a pillowcase are not located in the usual places. The upper part of the pillow is seamless. If the pillow is not sewn for decorative purposes, then from a practical point of view it is better to sew a draft pillowcase first, fill it with a synthetic winterizer, and then put on a specially sewn pillowcase.
Show your imagination and create some cool pillows for this style!
Share
Pin
Tweet
Send
Share
Send