Share
Pin
Tweet
Send
Share
Send
So, every time I went to the beach, I took a bag with a towel with me, went with some things and went for a swim. Once I thought about how much you can carry these already bored packages with me and can I replace them with something ?!
Of course, you can buy a beach bag without any problems, but this option doesn’t suit me a bit - I like things, “my things” to be individual and unusual, in general, not like everyone else, while being as fashionable and comfortable as possible!
Search for a suitable option.
Being a curious and quickly trained person, I decided to sew a beach bag, which can be used for summer trips to the river, on my own. The idea, of course, fascinated me right away, only on the Internet I found a lot of offers that I couldn’t refuse and certainly wanted to sew a summer bag, you won’t believe it - from ordinary plastic bottles!
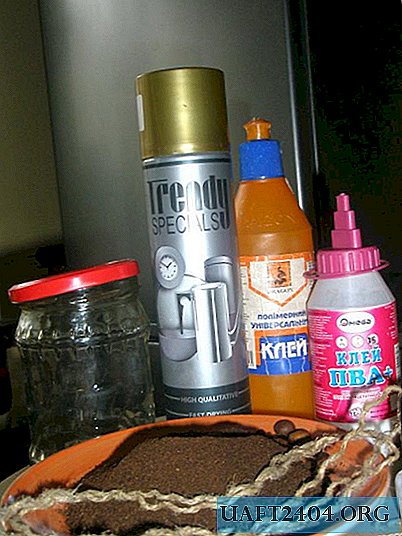
Having studied all the details, I stocked up with light bottles; I’ll say it is more desirable to choose “kopecks” and larger bottles. Large bottles are simply denser and easier to work with. We also select the threads of the desired shade, I settled on a ball of black and brown threads, took the usual, most inexpensive wool, and set to work. As you can see, we win significantly in terms of costs, let's see what the result is!
Harvesting the components of the bag.
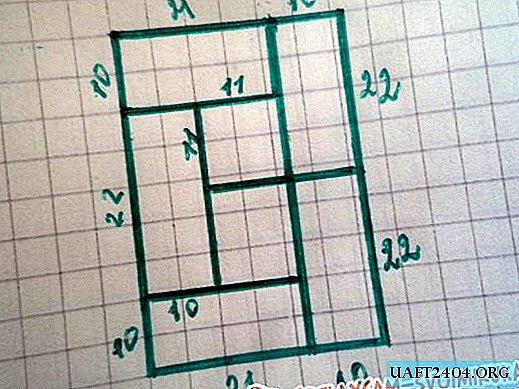
My bag consists of 10 elements fastened together. Of these, 4 elements, this is the front wall of the bag and, accordingly, the back wall of it (total 8). I’ll say right away that there is no bottom, it is obtained by folding the front and back walls of the bag, which are stacked together. Also the side parts are 2 elements and 3 on the handle, which can be of completely different lengths. The so-called "elements" are rectangles of various lengths and squares. So, having cut off everything unnecessary from the bottle, we maximally straighten the plastic sheet and cut out the necessary details from it.
Front and back walls.
2 rectangles with sides 10 by 22 cm, 2 rectangles with sides 10 by 21 cm, 1 rectangle with sides 10 by 22 cm and 2 squares with sides 11 by 11 cm.
Side parts.
2 rectangles with sides 10 by 20 cm.
Pens.
3 rectangles with sides 6 by 21 cm.
Please note that the material from plastic bottles will not be very convenient to use for further decoration, so the edges of all elements are slightly rounded with ordinary scissors.
Next, we take a large "gypsy" needle and sheathe each prepared element, imitating crochet according to the principle of "hand step". First, I trimmed it with black thread, after which I sewed another row over it with brown threads, in my opinion, it turned out attractively. After sheathing every detail, all the elements of the bag will become not so angular and already a little attractive!
Many, for convenience, first make holes in the plastic with a hole punch, then they sew, I tell you right away nothing happened, since the plastic is constantly moving and the holes are uneven, which in principle you will see in the photo of the bag on one of the elements.
The connection of the main components of the bag.
When all the elements are sheathed, we begin to connect them. Details are simply fastened together among themselves with the same "crustacean step". We start from the front and back walls, this will be a single canvas, which we then roll up in the middle. After folding, the product will be slightly "angular", but when the bag is finished to the end, this trifle will disappear.

In general, the canvas should be as in the photo, combining elements of appropriate sizes. We fold it in half, precisely determine the middle and along the edges (sides) we sew on the side parts one by one, forming the inner region of the bag. Sew on the sides starting from the bottom, exactly from the middle, moving away on both sides to the top.
After connecting all the main parts, your product will look like in the photo.

From the inside out.


Sew a pen
Details of the handle, and we have three of them in turn interconnected photo.

Sew each edge to the main part of the summer beach bag. In principle, our bag is ready!


Bag lining
Appearance, as you see, seems a little rustic, so I additionally decided to sew a “lining”. Merki removed from the main canvas and sewed such a bag here, additionally stitching a pocket on it.

The upper part of the pad was trimmed with inlay, which gave it a presentation!
We turn the lining on the wrong side and sew in the bag.

The same material as used on the lining is sewn to the elements of the handle.

Shutdown
The beach, summer bag does not close, so it will be slightly protruded when filled. To eliminate this drawback, sew a buttonhole and a large button.

We leave for the beach with a new, stylish beach bag.

Using this sample of making bags, you can take yarn and bottles of various colors, which will allow you to get a completely different, but no less original product. In addition, instead of a button, you can sew a tape, a zipper. To my surprise, the summer beach bag was not only roomy, but also comfortable. Despite the fact that the size of the bag is small, it can withstand quite a decent weight!
Share
Pin
Tweet
Send
Share
Send