Share
Pin
Tweet
Send
Share
Send
For work you need:
- dense fabric of red or crimson color,
- dense fabric of light green or dark green color,
- a small piece of cellophane with a dense structure,
- dark marker
- scissors for fabric
- 2 pieces of large buttons on the leg,
- a small piece of black fabric of dense structure,
- a set of colored threads (raspberry, green, black),
- sewing machine.
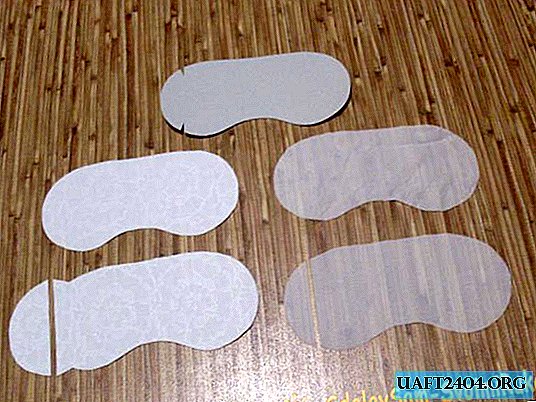
Pattern of product details:
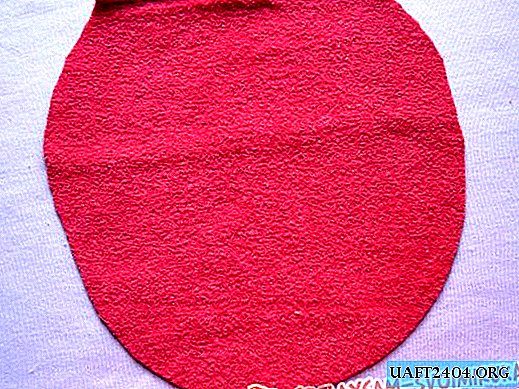
a) item No. 1-2 "F 1" made of raspberry-colored fabric
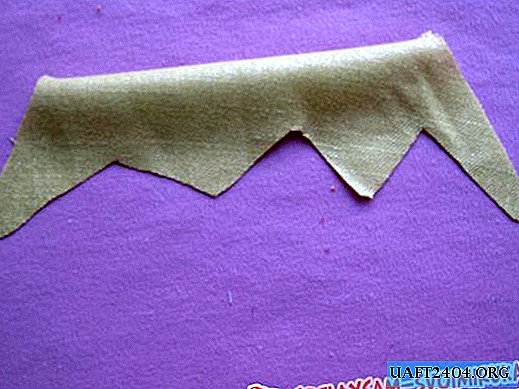
b) item No. 1-1. "F 2" from cellophane
c) item No. 2-1pcs. "F 1"
d) black fabric patch of dense texture
First step:
From a piece of raspberry-colored fabric with a dense texture, we cut out two details No. 1.
From a piece of light green fabric, we cut out one part No. 2.
From a piece of cellophane with a dense structure, we cut one part No. 1.
Second phase:
Parts from the fabric are well steamed and ironed.
The third stage:
Part No. 1 of fabric and part No. 1 of cellophane are adjusted to each other and chopped off with needles. It can be sketched manually, if it is more convenient for you.

Stitch them together on a typewriter.

Fourth stage:
Carefully fold part No. 1 and part No. 1 with cellophane facing each other. Get started. Iron and seam allowances. We turn the resulting part from the wrong side to the front side.

Iron and steam. We cleanly build into the edge at a distance of 5 mm from the cut on the machine. On a typewriter we choose a seam a direct line

The fifth stage:
Part No. 2 is imposed on the finished structure.

On a typewriter, select a zigzag seam for applications and grind them with a decorative stitch. The length of the zigzag line steps is the smallest. In all modern cars, this function is sure to be there.
Sixth stage:
For ties we use a ready-made oblique trim. If there is no inlay, then you can make it yourself. Simply we smooth out a strip of fabric several times and we cut it off with a straight line on a typewriter.

Sew on ties and decorated buttons on a long leg. The color of the selected buttons can be any. But the main condition is to be contrasting with the colors of the product. This is the indescribable beauty I got in two hours of free time.

Seventh stage:
The final touch - we attach a mouth. Gently apply the applique with a black shred mouth to the finished product. The whole product is ready. That’s what beauty has turned out.

The eighth stage:
Well steamed and ironed the finished product. Wear it with love !!!
Share
Pin
Tweet
Send
Share
Send