On the Internet you can find many options for home-made grinding machines for the home workshop and garage. But, as they say, progress does not stand still, therefore especially inventive and resourceful masters constantly come up with new home-made products. In this article we will tell you how to make a table grinder from an electric drill.

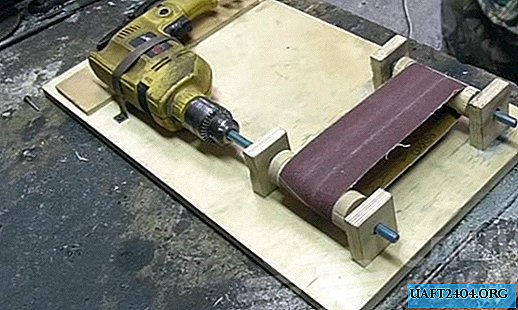
A rectangular piece of plywood with a thickness of 16 mm is used as the base, on which the remaining "accessories" are attached - rollers for the sanding belt and drive (in this case, an electric drill is used, but can be replaced with a small electric motor).
The main stages of work
The first step is to make two rolls on which the sanding belt will be attached - they can be made from round wooden discs or cut from plywood with five-copecks and glued rollers out of them, then machined to the desired size on a lathe. In the finished rolls, you need to drill a central hole with a diameter of 10 mm.

Then we put the wooden rollers on the hairpin and tighten the nuts on both sides. Next, we cut brackets from plywood or boards to fix the rolls. We make a marking, after which we cut out four squares in which we drill holes and press in steel bushings. Then the brackets are attached to the base of the table grinder.

At the last stage of work, we attach an electric drill to the plywood with a clamp, and insert the pin of the drive roll into the cartridge. We pull the tape and a homemade bench grinder is ready to work. A detailed manufacturing process can be seen in the video on the website.

