Share
Pin
Tweet
Send
Share
Send
Such a cute little flower or a bunch of flowers can be presented to your beloved man, girlfriend, mom, grandmother, teacher for any holiday!
Making a flower card is very simple and even a young child can do it. The very first and most important thing is to make a flower template. You can think of it yourself, or you can use the proposed one. The type of flower can be completely different: a tulip, a rose, a chamomile ... it all depends on your imagination and creativity! Now we will make a flower in the form of a tulip.
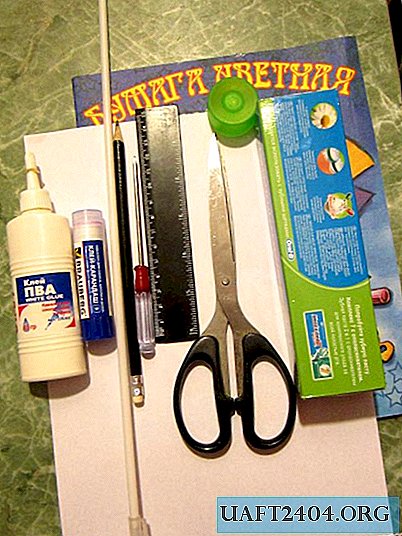
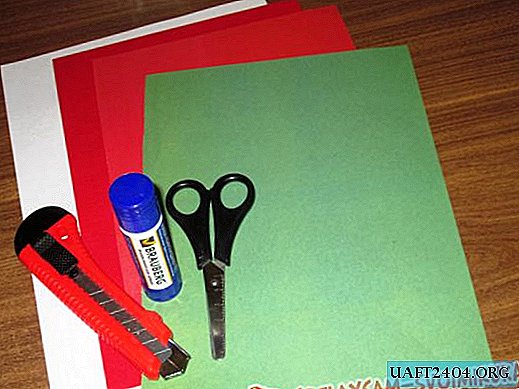
In order to make a flower card with your own hands, you need to prepare the following materials:
- color cardboard - 1 sheet, it is necessary for the bud;
- colored paper - 1 sheet, it should be the color of a sheet of cardboard, and is necessary in order to make gluing inside the card;
- 1 sheet of green paper for the stalk and leaves;
- white printing paper - 1 sheet, it is necessary for drawing a template;
- glue (better glue stick, it will be more convenient);
- scissors and stationery knife;
- a simple pencil and an eraser.
To begin with, as mentioned above, it is necessary to make a template. You can sketch the drawing of the template on a sheet of printed paper yourself, or you can print the tulip template we offer.

The template must be cut and then circled on the back of the cardboard sheet. Cardboard for this craft is suitable for anyone, however, toned with embossing will look much more effective and advantageous. (In the photo, the reverse side of the cardboard is red, as in the process of making the flower cardboard is used, tinted with embossing, and it is double-sided).

Now the blank of color cardboard can be cut.

The blank must be bent so that a flower bud is obtained. If after that somewhere on the inside of the cardboard or any flaws will become visible, they will need to be trimmed. If suddenly the flower turned out to be angular, then the corners can be smoothly and accurately cut.

So, the flower is ready, go to the leaves. From a sheet of green paper you need to cut a strip in the length of the sheet, about 2 or 3 cm wide. Lubricate the strip with glue on one side. It is better if the paper is double-sided. If this is not available and you are using single-sided paper, apply glue from the wrong side.

We begin to twist the flower stalk from a strip of green paper.

So the stalk is ready!

Now you need to start assembling the flower. We put the elements as follows: at the bottom there should be a sheet of colored paper to match the color of the bud itself - this is gluing inside the card. On top of the sheet we put the stem, and then the expanded bud, which should be oiled with glue on the back side. The stem should be placed somewhere 2 cm inside the bud. If you see that the stalk turned out to be too short and will look disproportionate to the bud, you can spin an additional stalk from half of the same strip of green paper and stick it to the first stalk from above.

In this form, without cutting the paper, we fold the bud, and then place the blank of the card under the press for a short time.

Now you need to trim the excess paper. And in order to close the card’s bud tightly, you need to make an arched cutout on one of its sides with the help of a clerical knife.

Now we begin to make leaves. To do this, take a strip of green double-sided paper about 4 cm x 20 cm in size. If you are working with single-sided paper, you should glue two such strips inside out.
So, we bend a strip of green paper across in half, draw a leaf with a small handle on the near side. Moreover, the handle should be at the fold line in order to be able to cut the same sheet from two sides, and then expand.

Cut the sheet without unbending the strip. It should look like this:

Now bend the leaves back along the fold line, and then bend again, but already in length. Now fold the leaves obliquely, as shown in the photo.

Now we unfold the leaves - they turned veins. Glue the leaves to the stem.

So, the flower card is ready! Inside it can be designed to your liking: it will be beautiful if you stick a photo there and write a wish. Such an unsurpassed little surprise will delight your loved one! And every time a glance cast at a flower reminds him or her of you ...


Share
Pin
Tweet
Send
Share
Send