Share
Pin
Tweet
Send
Share
Send
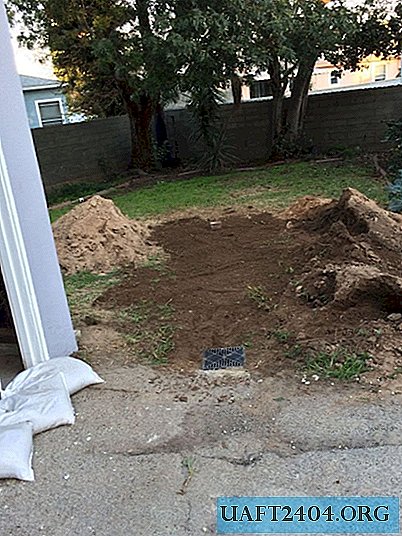
When I bought the house, I was warned that a puddle was gathering in front of the garage during the rain. But the previous owner kept silent about the fact that, it turns out, water is flowing into the garage.
To solve this problem, I decided to make a drainage system. It will not work to take the stormwater pipe out of the yard, since a slight deviation from the road goes towards the yard, which, in fact, becomes the reason for the flooding of the site. Therefore, I decided to equip the drainage well in the yard, away from all buildings. To understand the amount of work, how much and what materials will be required, I hand-sketched a drawing with the location of the main elements of the drainage system and approximate dimensions.
Necessary materials
To fulfill my plan, I prepared the following materials:
- Plastic tank (barrel) for 250 liters.
- A storm water inlet and a plastic pipe with ready drainage holes for the organization of a drain.
- Plastic flange with a diameter of 110 mm for connecting the pipe to the receiving tank.
- Geomembrane.
- Gravel.

We make a drainage system without sewage

First of all, you need to make markings on the ground. I acted simply: laid out all the elements on the ground and marked with pegs the size of the trench to be dug up.

After digging a trench with a depth of 50 cm, he began to prepare a foundation pit for a water intake tank. I dug 50 cm more in depth than the height of the tank to equip a gravel pillow.


Advice! If you don’t know the location of the communications (as in my case), you need to check with the utilities or dig very carefully so as not to damage anything if you come across a cable or pipe.
When the excavation was completed, he began to prepare a water intake tank. In a plastic tank, he drilled holes in the bottom and sides on the bottom. Then he cut a hole in the upper part and installed a flange for connecting the pipe.


The next step is to lay the geomembrane along the walls of the well and trench so that they do not sprinkle and do not overgrow with weeds.

Having laid the membrane, he poured a layer of gravel at the bottom of the well so that the tank lid remained about 10 cm below the ground level. A small layer of gravel cushion was also poured into the trench, under the pipe.

Then he installed a tank in the pit, and laid the pipe down the drainage holes in the trench and connected them. From the other end, a storm water inlet was connected to the pipe. Here you need to make sure that the slope of the pipe is towards the tank.


I connected an adapter to the opening of the neck of the tank and installed another grate, into which water will leave in the case of a lawn gulf. Also, this conclusion will act as a ventilation hole of the well.


Having collected all the elements in a single design, he continued to add gravel until he filled the pipe and aligned it with the top edge of the tank. After that, he wrapped up the remains of the membrane on top of the gravel pillow and fell asleep on top with excavated soil.


It remains to remove the remaining soil from the site and the storm drain from the garage is ready!

Original article in English
Share
Pin
Tweet
Send
Share
Send

