Share
Pin
Tweet
Send
Share
Send
During the period of even the most correct operation, the battery loses its capacity every day. And at one point, his charge is not enough to start the car engine. This example escalates with the advent of cold weather.
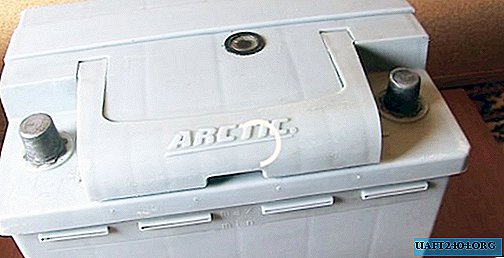
Naturally, the car enthusiast puts the battery on charge and after a while sees that the battery is not charging, and the voltage when charging is normal - 14.4-14.7 V or higher (12.6 without a charger).

Then, if there is a load plug, a check is made to it and it turns out that under load the voltage is drastically drained. Everything indicates a loss of capacity by the battery. The reason for this is the sulfation of the plates.

Usually, with proper use, this happens after about 5 years. This is a very good indicator. And there is a way out - to buy a new battery. But, if you want to save money (since the batteries are not cheap now), and extend the battery life by a couple more years, then it is necessary to carry out its maintenance. And not simple, but special, which can revive the battery.
What batteries can be restored?
This method is suitable for batteries that were not exposed to severe current or mechanical damage during their use. And they became unusable as a result of temporary, natural sulfation.
This method is not suitable for rechargeable batteries in which there is an internal shedding of plates, there is an internal circuit of the cans, there is a swelling or other mechanical damage.
The method is excellent for desulfation of plates and is popularly called the method of "polarity reversal" of the battery.
I will divide battery recovery into three phases.
Battery Recovery Process
Stage One: Preparation
The first thing is not necessary, but you need to do it to clean the surface of the battery from any dirt. Wash the entire surface with detergent.
Next, visually verify that there is no damage to the case, in the absence of swelling and bulges on the sides.
Second, open all the can plugs and make sure that there is electrolyte. If it is not in one of the cans, then you need to make sure that there are no cracks in the case.
Then, using a flashlight, inspect the plates inside - there should be no scattering. Here just for one you can clearly see sulfation - a white coating on the plates.

If everything is in order, add distilled water to each can to the level. It will not be superfluous to measure the electrolyte density of each compartment.
Stage Two: Classic Recovery Method
Before proceeding to battery polarity reversal, it is necessary to test the usual recovery method, which has already become a classic.
Step one: charge the battery to a full charge of 14.4 V.

Step Two: with a halogen bulb or other load, discharge the battery up to 10.6 V (voltage is measured under the same load).

We repeat the cycle of these two steps 3 times and charge the battery to full. We check the capacity of the load fork or starter in the operation of the machine. If the battery has recovered - well - continue to operate. If not, or not enough, then go to the third stage.
Stage Three: Battery Reverse
This method of battery recovery is the most effective of all existing. And reanimates the battery in almost 90% of cases.
Step one: We hang on the battery a load in the form of a halogen lamp, and discharge the battery to zero. The lamp goes out after about a day (it all depends on the initial battery capacity). We leave the battery with the lamp connected for another 2-3 days in order to finally discharge the residues.
Step Two: reverse current battery charging. We connect the charger on the contrary: plus to minus, and minus to plus. In order not to spoil your charger (or to prevent short circuit protection), we connect the same halogen lamp in series with the batteries. And charge the battery in reverse polarity. After the voltage rises to 5-6 volts, the lamp can be excluded from the circuit. It is advisable to set the charge current to 5 percent of the battery capacity. That is, if the capacity is 60 ampere-hours, then we set the charge current in the opposite direction to 3 Amperes. At this time, all the banks with the electrolyte begin to seethe actively and hiss — this is normal, since the reverse process is going on.

We charge for about a day, until the voltage of 12-14 V. appears. As a result, you have a fully charged battery with a minus on the plus output and a plus on the minus.

Step Three: again, we completely discharge the battery with a halogen lamp for a couple of days. Then we make the correct charge plus to plus, minus to minus. We charge to full to 14.4 V.
On this all actions are completed.
Battery Recovery Result
Typically, the result helps to increase the battery capacity to 70-100% of the factory, of course, there are exceptions.
Specifically, in my case, I managed to raise the capacity by 95% - which is an excellent result. White deposits of sulfate disappeared from the plates, and they turned black like a new battery. The electrolyte has become more transparent and clean.
Battery Recovery Video
I recommend that you watch a video where the battery is completely "dead", which is about 10 years old.
At the beginning there is a “buildup” with a change in the polarity of the power supply, and almost at the very end a complete reversal cycle has already been given.
Share
Pin
Tweet
Send
Share
Send