Share
Pin
Tweet
Send
Share
Send
In order to make such a photo album with your own hands, you will need the following materials:
- an album for photos in a paperback (if the number of sheets is small, then you need to take 2 or 3 of these);
- binding or any other very dense cardboard;
- synthetic winterizer;
- fabric (cotton, satin, linen);
- glue moment crystal;
- sewing machine;
- scissors, needles, pins, threads;
- cutting mat (optional);
- double sided tape;
- decorative cardboard;
- A variety of decor (lace, ribbons, buttons, chipboards).

First you need to prepare the basis of the album: gently tear off the blank cover.


We measure the width of the spine and add 5 mm of distance between the blocks (if there are several) and 20 mm on each side. Cut a cardboard strip of the resulting width. For the length it is necessary to add 0.5 cm to the block height on both sides.


We fix strips of double-sided tape on the spine of the block at the top and bottom.

We glue the block to the prepared strip of cardboard and sew it on a typewriter with a zig-zag seam.

Using a needle, we thread the threads on the back of the spine and glue it with tape. We bend cardboard at a distance of 10 mm from the edge.

After that, measure the length and width of the workpiece on the front side, the width of the block. We cut out 3 parts of the cover from thick cardboard: 2 front cover (you need to add 1 cm to the length and width of the front of the album) and one root (add 1 cm to the length, the width remains the same).

We apply glue to the workpieces and glue them with sintepon.

We cut the synthetic winterizer to the edge to the cover and iron it through a layer of cotton fabric (so it will become flatter).

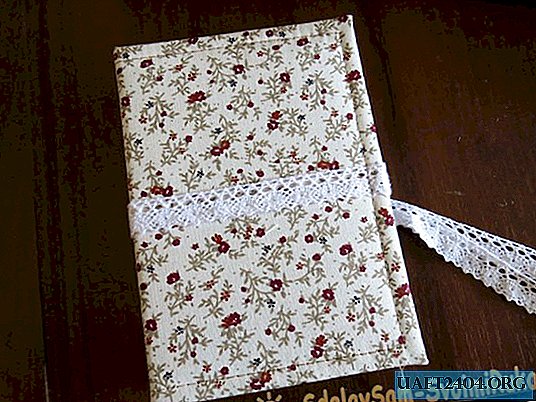
We take the fabric intended for the cover and cut it out, leaving allowances on each side of 15 mm. First of all, we glue the sides of the cover with glue and glue the material.

Glue the bottom and top, after cutting off the pieces for a beautiful corner.


Lubricate the corners with plenty of glue and leave to dry for 5-10 minutes (for the best effect, you can pin them with pins).

After drying, measure the length of the tie (lace or ribbon) and pin it around the perimeter of the album.

We sew the finishing line, departing 5-7 mm from the edge.

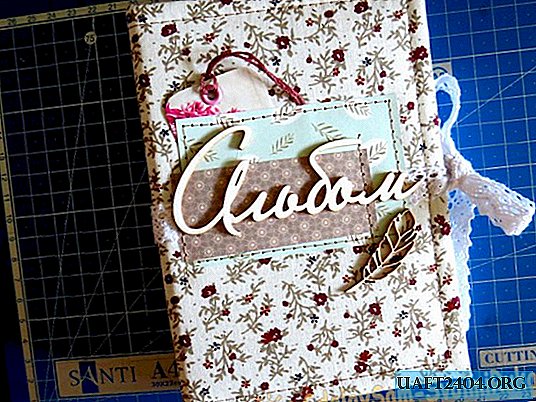
We try on the decor and attach it. In order for nothing to move out during sewing, you can use double-sided tape.


We display all the threads on the back side and fix with glue. We glue the chipboards.

Apply a lot of glue to the spine and glue the blank to the cover.

After the glue has completely dried, we cut out 2 details of the flyleafs from decorative cardboard, glue them.


The photo album is ready!

Share
Pin
Tweet
Send
Share
Send