Share
Pin
Tweet
Send
Share
Send
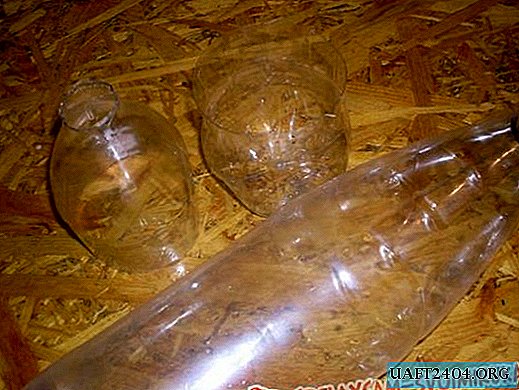
1. An empty plastic bottle of 1.5-2 liters.
2. Doll (Barbie, Cindy upper torso).
3.5 m tape 4 cm wide.
4.5 m lace.
5. Lining fabric 2 rectangles 15 cm high, the length should be slightly larger than the diameter of the bottle.
6. Cotton pad 2pcs.
7. Gun and glue.
We cut the empty bottle 10 cm bottom, and 10 cm top. From the upper half you need to cut the neck.
We take a cotton pad, cut out a circle of the same diameter from the lining fabric. You need to stitch them together (you need to put a few lines, so that you get the squares), so it will become a little denser. The second cotton pad can be cut a little, making it smaller in diameter and repeat the procedure.

Next, we take the prepared rectangle (lining fabric) and from the side that is longer, give a free line, so that it can be pulled. We tighten the line and make a tube from the fabric into a cotton pad in diameter, sew it. To get the bottom, we sew a 0.5 mm stitched circle (where we pulled the fabric) with a stitch.
The same procedure must be carried out with another cotton pad, which is smaller in diameter, this cylinder will be for the upper part of the box.
At the bottom of the bottle we place our lining - a cylinder, carefully straighten it and lay it on the outside. Using hot glue, beautifully laid (in small folds), you need to glue the lining to the bottle (outside). You also need to cut a piece of 5 cm from the tape and stick it to the edge of the lining (as in the photo), this will be the fittings.
We do the same with the second half of the bottle.

Now let's start making dresses. We sew the ribbon and lace together with a free line along the edge and tighten it a bit (you need to make even folds). We take hot glue and with a gun we begin to glue the dress on top in a circle. We make a circle, cut it off, very carefully glue the joint. Step back a little, make the next row. And so on until the end of the bottom half of the bottle.


Getting to the top, you need to make our doll clothes. Here, using the tape, we make a bodice for every taste (in our case, fastening the ribbon crosswise). With the remains of lace and ribbon, you can make a hat. Having pulled to the limit, beautifully lay out the lace, and lay the ribbon on top (stick the hat to the head).


Next to the top of the bottle you need to insert the doll and carefully fix it there. Then we take lace with a ribbon and repeat the procedure for creating a dress. We start gluing from top to bottom. After the upper part of the casket dries, you need to connect the casket by gluing to the upper part that piece of tape that we first fixed on the lower half.


Share
Pin
Tweet
Send
Share
Send