Share
Pin
Tweet
Send
Share
Send
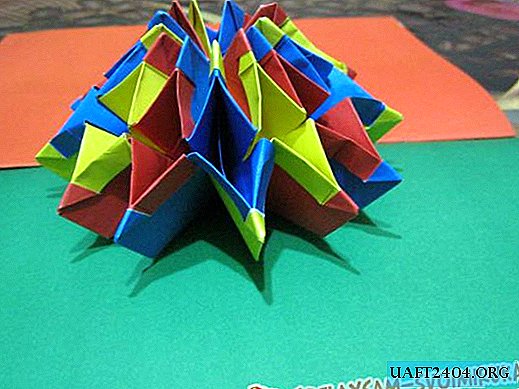
In order to make such a toy you will need 12 sheets of colored paper. Three colors of 4 sheets. The sample used blue, red and yellow.

The paper size should be 14x14 cm. Therefore, two squares can be made from one sheet of colored A4 paper. It is advisable to take thick paper, but not cardboard. In order to clearly see the folds, purple paper is used in the sample module. The fold is underlined by the handle. If you assemble such a module on a product, then nothing should be emphasized with a pen.
You should take the sheet and bend it in half so that a triangle forms from the square, as shown here.

We got the diagonal of the square.

The same actions are performed on the other hand, so that the bends look like here.

Next, the square is bent in half.


We bend the half again in half, on one side and the other.


We turn back. Again, bend the sheet by 1 cm on both sides.


As a result, we get such folds on the sheet.

Again, highlight the diagonal folds.

Take the transverse fold line and connect them together to make a triangle.


We smooth it well so that the sheet does not bristle.

Next, put one finger on the line in the middle of the triangle, with the other finger take its lower part and rise up to the sharp corner.


The edges of the paper that are puffing are smoothed below.


The same action is also performed on the reverse side of the triangle. It turns out a nice house.


Further it is seen that the house has a bend line below. On this line, we bend the paper toward the outside, but not completely.

The remaining side is bent in the shape of a triangle.

The same actions are performed on the other side of the house. In total, they should be four. Two on one side and two on the other.

Unbend everything back, as it was.

Here's what happened.

The same modules are made from the remaining 11 sheets.

After the modules are done, you can proceed with the assembly.

One of the two triangles of the module must be inserted into the "pocket" of the other.


And so all 12 modules.


Turn the connected modules upside down.

We take the connection between the two colors (the fold line is noticeable there), bend inward.


We work out the internal bend well.


This is done with each connected sheet from two sides.

After all the corners are bent inward, we begin to work out the sides of the product. The first and last module does not touch. On the model product, the extreme module is red, it is connected to blue. We leave this side. Next, the place where the blue module is connected to the yellow one, we start working with them.

We unfold them like a book, thus:

A transverse fold is visible from above. We bend it.

Here is what should result in:

Next, we turn over as a leaf of the book to the next module. And we do the same actions, and so almost to the last module (we do not touch it).


All this is done on the other hand.

Turn our product back up. Having spread it a little, we will expand in a semicircle. Connect the first and last module to each other, as was done at the beginning.

Again, turn it over to itself bottom.

And we twist it to get the appearance of such a flower.

The edges of the last connected modules are processed in the same order as at the beginning. First, a corner inward, and then bend the sidewalls.


The whole product is ready.

It can be turned in different directions, such interesting figures are obtained.


Share
Pin
Tweet
Send
Share
Send

