Share
Pin
Tweet
Send
Share
Send
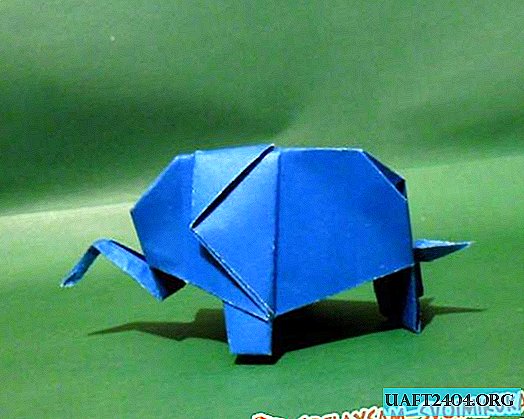
If your baby can easily make a boat or an airplane out of paper, then he can already be taught to make an elephant. First, you yourself will practice at your leisure, so that the child will not be bored with this process and begin to work. Moreover, this step-by-step instruction will allow you to easily complete this craft.
How to make an elephant from paper
Take a square sheet.


Fold it horizontally and vertically.

Expand.

Now bend alternately along the diagonals.

You have a square with horizontal, vertical and diagonal lines.
Grasp the side corners of the square nearest to you and connect its sides.


The diagonal fold will be inside. Do the same with the opposite marked square.
You will get such a blank. The center of the square is at the top.

Bend the side corners and the lower sides to the center line.

Turn the workpiece over and bend it the same way.

Bend the top corner down.

Iron all folds well.
Expand the top of the craft again. Fold the top leaf. Inside the "pocket" you can clearly see all the markings that you just made.

At the four folds that are at the edges, you must bend the sheet inward, aligning the corners.


You will get a high rhombus.


Flip the craft to the other side and there, too, bend the edges inward.
Lower the top corner down.

Turn the workpiece over again. You will see two pointed triangles there.

You must bend each triangle 45 degrees in different directions so that their vertical lines coincide with the horizontal.


Press the folds. You will continue to work on them.
Extend the outer edges of this narrow triangle.

Bend along the side lines so that you get such a rhombus.

Make a rhombus from the second triangle.

Turn the craft over again. There will be a small triangle.

Connect its top to the center of the craft. Flatten the fold.

Turn over the workpiece again. Bend side rhombuses to the middle.

Now each of them bend horizontally in half to the center line. This is you doing the legs to the elephant.

Fold them together with folds inward and bend to the side where the small triangle is located on the bottom of the workpiece.

Fold both halves horizontally.
Now make the back of the elephant. To do this, measure the height of the small triangle at the bend of the part and at the same distance bend the left side of the workpiece down so that its right side is parallel to the "legs" of the elephant.

Unbend it again. Extend its sides and fold the movable part inward along the bend.


On the long part, make a mark so that it is in line with the legs of the elephant.

Bend the corner up.

Extend the edge of the workpiece again and fold the corner there.

Bend the side edges so that you get a rectangle.


Turn the very tip of the part bent upwards outward, imitating a tail. Squeeze both halves.

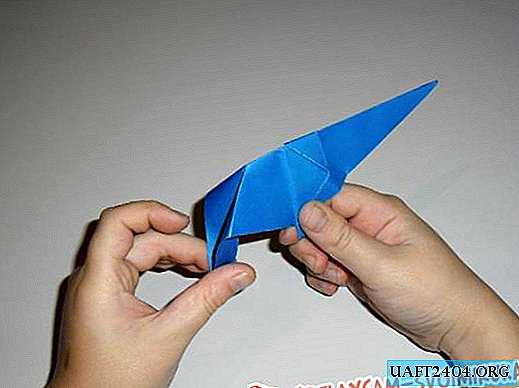
Now start making your trunk. Bend the sharp triangle so that its right side is parallel to the legs of the elephant.

Spread the side parts of the part, and fill this triangle along the prepared bends there.


Bend the sides of this part to the center line.

Connect both halves.

By bending the trunk in two places, give it a natural position.

Press on both sides so that the figure does not diverge in different directions.
Share
Pin
Tweet
Send
Share
Send