Share
Pin
Tweet
Send
Share
Send
For the first time the advent calendar appeared in European countries, later it began to be used in America. In Ukraine, such a calendar is just beginning to become popular. The idea of creating a special calendar is for children; it shows the days remaining until Christmas. The main essence of the calendar is that the child is waiting for Christmas, every day opens a new window with the day that has arrived and receives a small gift or a sweet surprise. Initially, the calendar was calculated from December 1 to December 25, because in Catholic countries Christmas is celebrated on December 25. And in Orthodox countries, the New Year is celebrated first, because of this the number of days in Advent has become longer. There are different calendars designed for 31 days (all of December), for 13 days (from December 19 to December 31) and even for 38 days (from December 1 to January 7). You can choose any for yourself, the main thing is to turn the expectation of the holidays into an unusual fairy tale.
What are they made of?
Today on the Internet you can find a large number of advents made of a variety of materials. The calendar can be made from anything, for example, from felt, plastic cups or children's socks, envelopes, cardboard or boxes, matchboxes, paper, children's gloves, even cups, gift bags and small bags, etc.
Master Class!
I am pleased to offer you an interesting Advent Calendar master-class with step-by-step photographs, which will be valid for 13 days, from December 19 - on St. Nicholas Day to December 31 - the beginning of the New Year celebration.
The main structure will be made of colored cardboard, each box will be numbered and decorated with a New Year theme. To make the countdown even more interesting, I enclose at the end of the MK a list of tasks for the child for all 13 days.
We divide the implementation of Advent into VI stages:
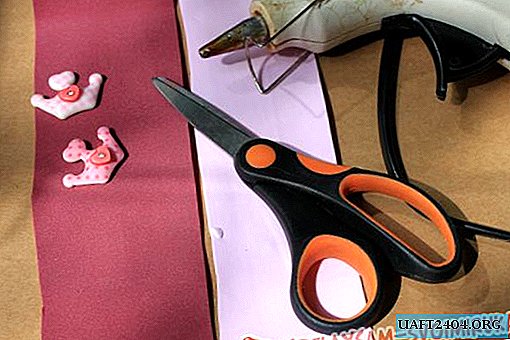
I. Material. In order to make a calendar with your own hands, you will need:
- ruler;
- a pencil;
- scissors;
- color dense cardboard (A 4);
- glue, double-sided tape, brush;
- spangles, tinsel;
- pictures with New Year theme;
- New Year's balls (small);
- narrow tape;
- other little things for decoration.
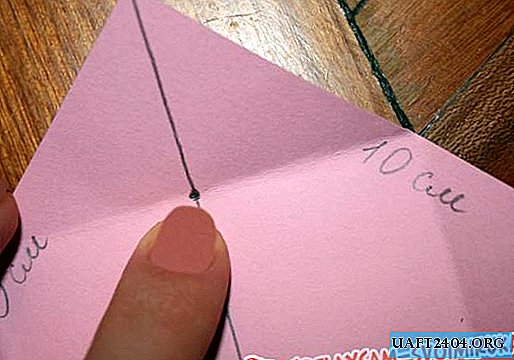
II. Making calendar boxes. One finished box consists of 2 parts - top and bottom. To connect the two halves, you need to accurately calculate their sizes. One box that will close the other should be larger, how to calculate, read on. For example, now we will make the smallest box, we make one part from a square with sides 10 cm, and the other 10.4 cm. Each subsequent box will be 1 cm or 0.5 mm larger, and so on up to 21 cm, t. to. this is the largest square that can be obtained from sheet A 4. The boxes in this Advent calendar are of different sizes, but you can make them the same, any variations are possible.
And so, first draw a square with 10 cm sides on color cardboard and draw two diagonals.

Then we wrap the corners of the square to its center - the intersection point of two diagonals.

We get the design, as shown in the photo.

Following the photos - we bend the corner of the square to the desired point, do it with the remaining three angles and get the design, as in the photo.


Now we wrap the corners of the square to the marked point, bend the resulting triangle in both directions, as shown in the photo.


We draw a square, as in the photo, cut the sides along the red lines, cut out the shaded triangles.


Finally, our box is almost ready, it remains only to be folded, follow the instructions in the photo.


If everything is done correctly, then you will get neat boxes. Most of the work is behind, it remains only to decorate and number all the boxes.

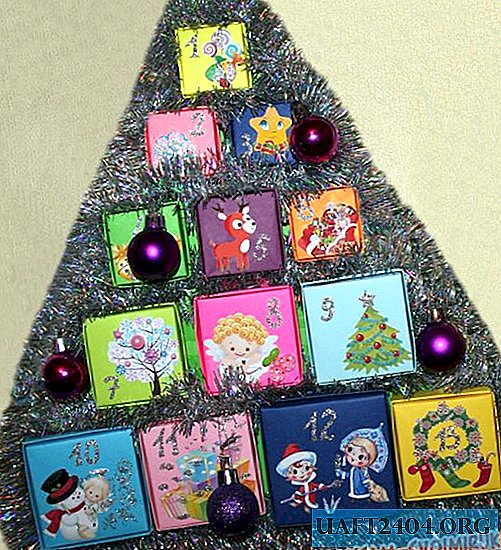
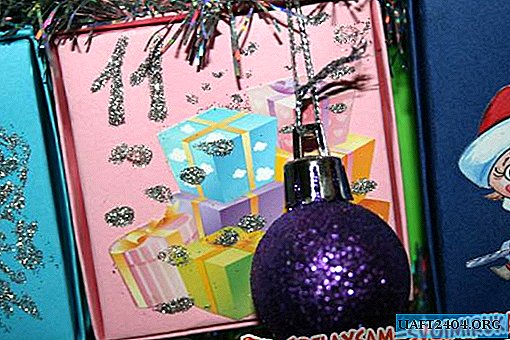
III. Decorating boxes with New Year theme pictures. You as parents should know what your baby loves, which cartoon characters he likes best. Therefore, the pictures can be any. In this calendar, I propose to take those images that are related to the New Year theme: sweets, snowflake, starlet, bells, deer, sleigh, winter tree, angel, Christmas tree, snowman with an angel, gifts, Santa Claus and Snow Maiden, Christmas wreath with socks on the door. To do this, you can print pictures from the Internet or use ready-made stickers, as you like. All other photos show the result of the entire calendar.
IV. Advent calendar numbering. In this calendar, the boxes are numbered from 1 to 13, you can do, on the contrary, in descending order. For example, 13 days are left until the New Year, which means you number the calendar from 13 to 1. Brush the glue and draw the desired number on the boxes next to the picture, immediately sprinkle with sequins (any color, gray in the photo), wait until it dries completely. The winter tree is decorated with beads, the Christmas tree is glued with small decorative stars, and the angel is decorated with berries.
V. Decoration, finishing touches. Depending on the size of the resulting boxes, we cut out the shape of the Christmas tree from green cardboard. Using double-sided tape, we fix the entire structure, place tinsel along the contour of the Christmas tree. We also attach small New Year's balls to tape. We hang the finished calendar on a ribbon threaded through the upper corner of the Christmas tree. Advent calendar is ready!
VI. List of tasks for 13 days. It is better for parents to buy sweet gifts on the eve of Advent, but it is better to prepare a list of tasks for 13 days in advance. Every day, in the next box, the baby will find a sweet gift and an assignment that will need to be completed by himself or with his parents. Do not forget that the child receives a surprise on behalf of Santa Claus. Depending on the weather, tasks can change, and given the baby’s capabilities, tasks can be done easier or harder.
1. Make cards to your family (grandparents, parents).
2. Decorate the Christmas tree with toys.
3. Make snowmen out of socks, foil or draw.
4. Make greeting cards to friends.
5. Read New Year and Christmas books (if a child is learning, for example, English, read books in a foreign language).
6. Blind a snowman, ride a sleigh.
7. Learn a poem for Santa Claus.
8. Bake cookies with parents in the form of New Year's images.
9. Draw on the snow with colorful water (with paint).
10. Freeze any tins with tinted water and dress up the Christmas tree in the yard.
11. Watch New Year cartoons.
12. Write a letter to Santa Claus.
13. Decorate the window with snowflakes.


As you can see, there are a lot of cases, change, plan them as you like. You will see how your child will be grateful to you by receiving such an unusual Advent calendar.
Share
Pin
Tweet
Send
Share
Send