Share
Pin
Tweet
Send
Share
Send
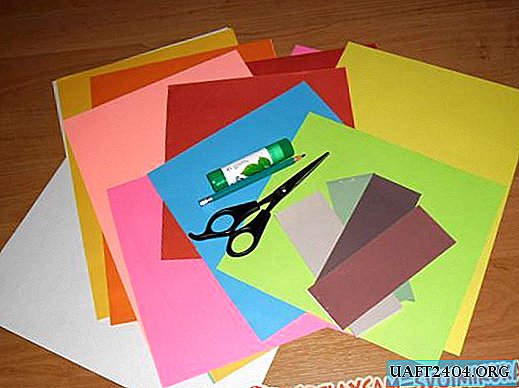
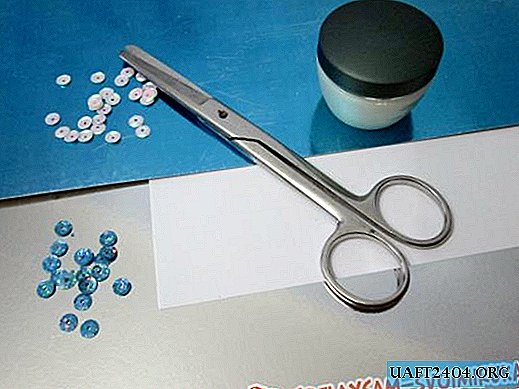
1. Materials and tools:
• Thick colored paper.
• Scissors.
• Pencil.
• Sequins.
• PVA glue.
![](http://img.uaft2404.org/img/sdela-2019/korobochka-s-pozhelaniem.jpg)
2. Transfer the template to thick colored paper.
![](http://img.uaft2404.org/img/sdela-2019/korobochka-s-pozhelaniem-2.jpg)
![](http://img.uaft2404.org/img/sdela-2019/korobochka-s-pozhelaniem-3.jpg)
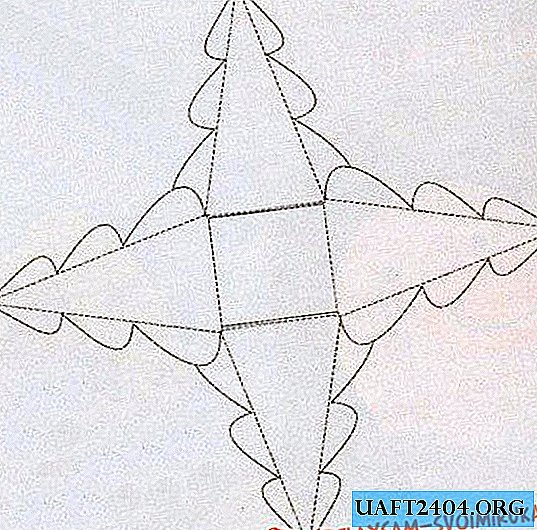
3. We bend all four sides around the perimeter of the square inward.
![](http://img.uaft2404.org/img/sdela-2019/korobochka-s-pozhelaniem-4.jpg)
4. Side wavy edges bend outward.
![](http://img.uaft2404.org/img/sdela-2019/korobochka-s-pozhelaniem-5.jpg)
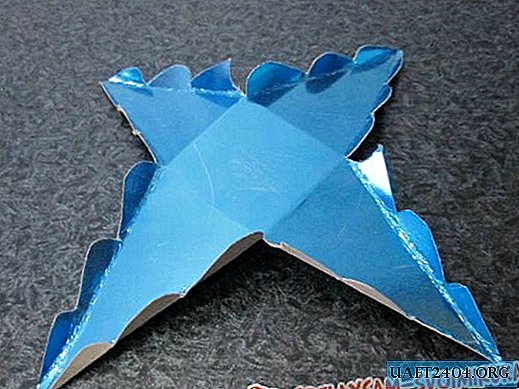
5. We put in the center a note with a wish.
![](http://img.uaft2404.org/img/sdela-2019/korobochka-s-pozhelaniem-6.jpg)
6. Glue the top of the tree.
![](http://img.uaft2404.org/img/sdela-2019/korobochka-s-pozhelaniem-7.jpg)
7. Glue any bow.
![](http://img.uaft2404.org/img/sdela-2019/korobochka-s-pozhelaniem-8.jpg)
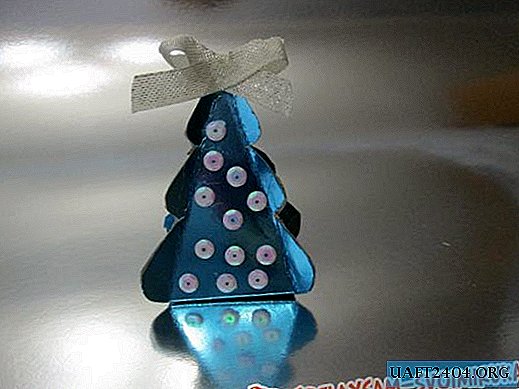
8. The Christmas tree is ready.
![](http://img.uaft2404.org/img/sdela-2019/korobochka-s-pozhelaniem-9.jpg)
Share
Pin
Tweet
Send
Share
Send